Anatomy of a Photograph
Anatomy of a Photograph
INTRO
Anatomy of a Photograph is for any photographer, regardless of what camera is being used and skill level. I will focus on the little things that, when you add it all up, makes a good image great. You can read about lighting and rule of thirds all you want but some of us are just visual learners. Hope this helps.
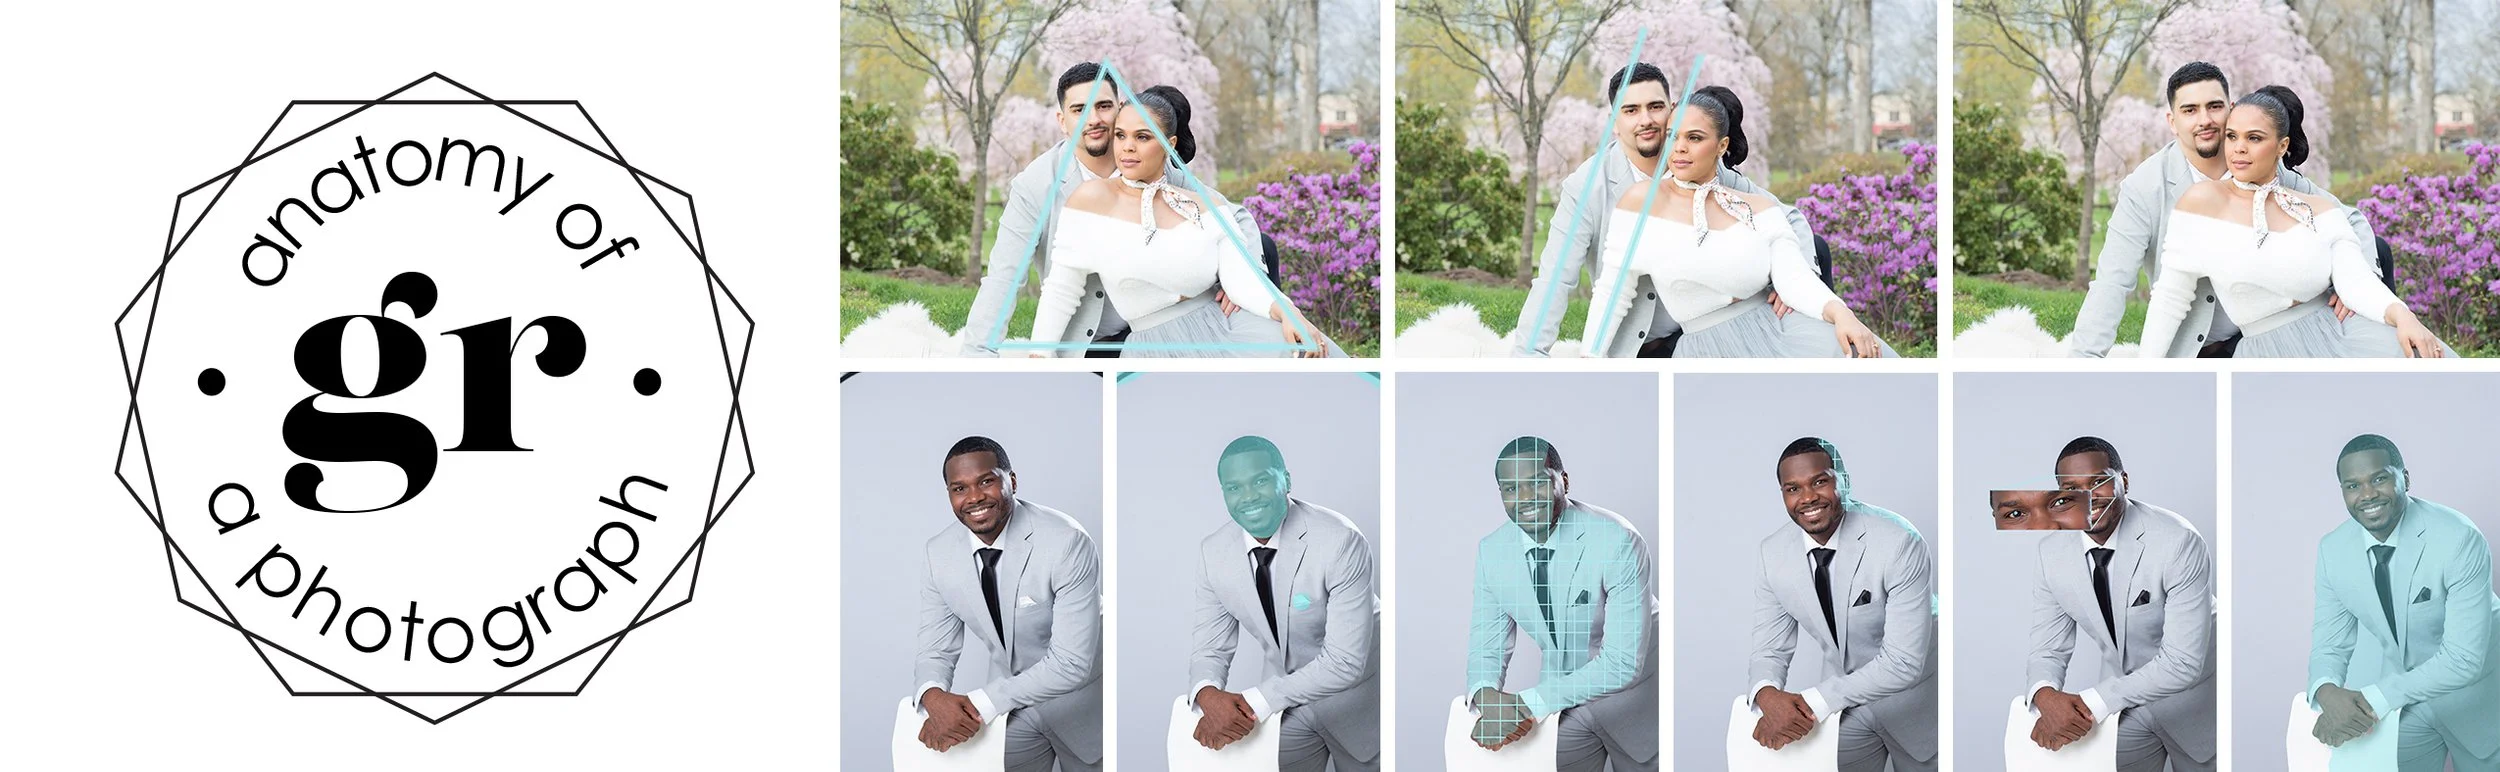
SHAPES & LINES

Shapes in photography are your friend. When posing more than one person, triangles are your best friend. Notice the positioning of the subjects’ arms and legs. They make a triangle. If you notice both of their arms, they form parallel lines. Put it all together and it makes a very visually pleasing image. Click the gallery for a close up.


LIGHTING & EDITING
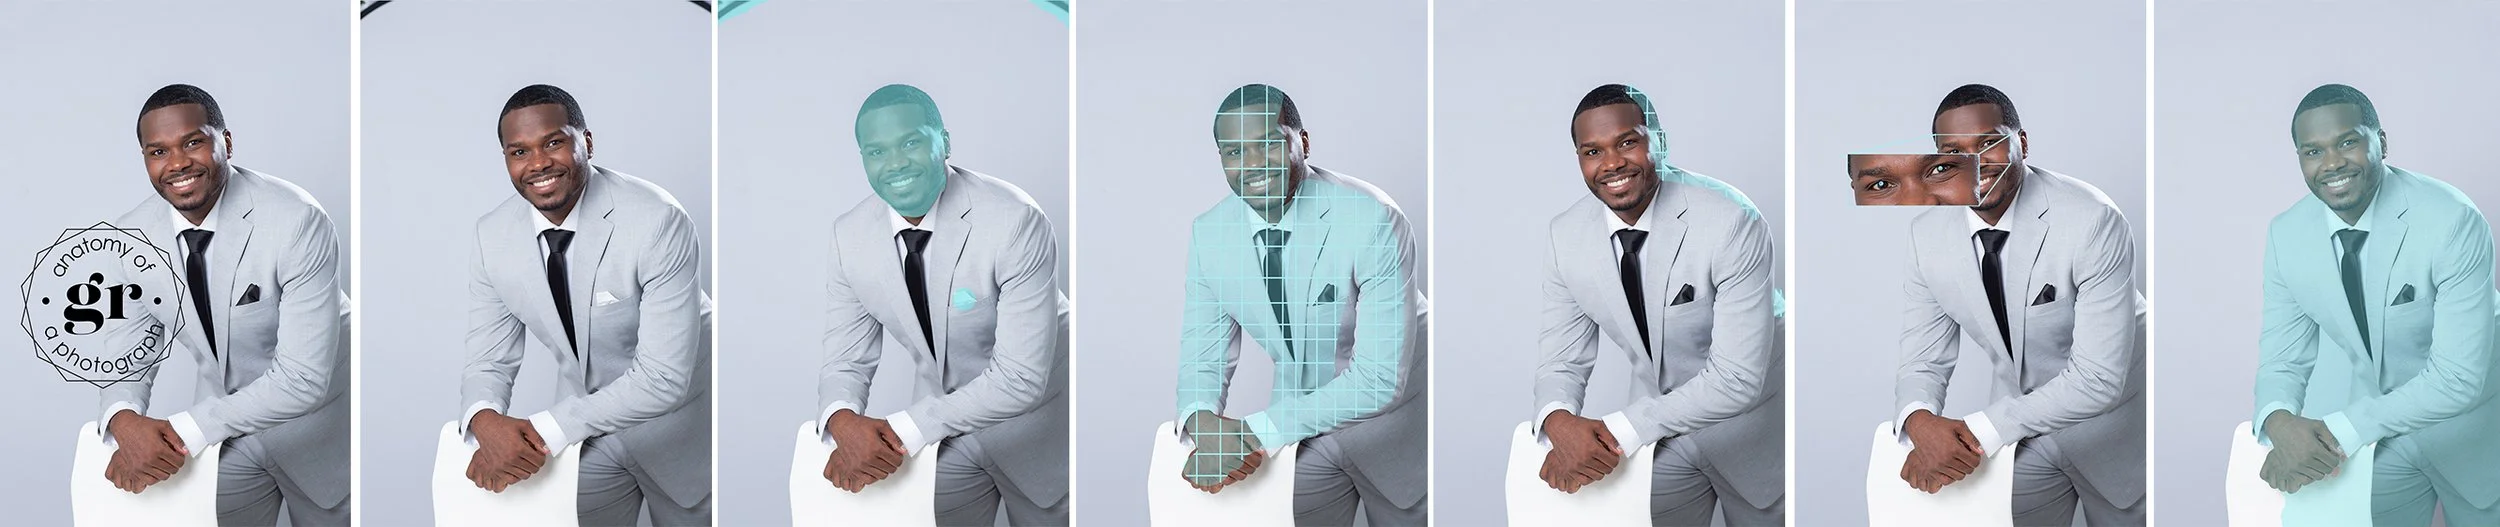
For most of my headshots, I use two lights: a key light (front) at 45 degrees and above the subject with a rim light (back) to separate the subject from the background. I also make sure there’s a catch light in the eyes of the subject. When editing I remove eyesores light the edge of the backdrop and soften the skin. Extra credit for knowing poses that slim your subject’s face like leaning forward. Click gallery for a close up.